Pride Month is fast approaching!
Mục lục
To celebrate, Bellacures nail salon is sharing how they created three Pride-inspired nail looks. Follow the tutorials below to recreate these nail looks for your clients.
Skittle Manicure
Celebrate Pride all month long with colorful manis galore!

- Begin by filing your client’s nails to their desired shape and completing cuticle care.
- Next, take your array of rainbow polishes and coat each nail evenly, changing polish colors in between each nail.
- Allow time to dry, and apply a second coat of polish making sure to get the tips of the nails when polishing. This will minimize the likelihood of chipping and help ensure a longer lasting mani!
- Finish off with a top coat and cuticle oil for maximum shine.
Rainbow French Tips
Show your support and love for the LGBTQ+ community by incorporating these rainbow colored frenchies into your June beauty routine!

- Begin by filing nails in an almond shape, and complete cuticle care.
- Next, pick a base color that suits your client’s skin tone. Apply two coats to the nail bed, allowing dry time between each coat.
- Once this is complete, take your assortment of rainbow polishes onto a thin lined brush, switching colors between each nail. In a swift motion, draw a curved line from one edge to the other and fill in the tips.
- Once dry, carefully go in with a second coat of polish to make sure your frenchies are nice and bright!
- Finish off with a top coat and cuticle oil for maximum shine!
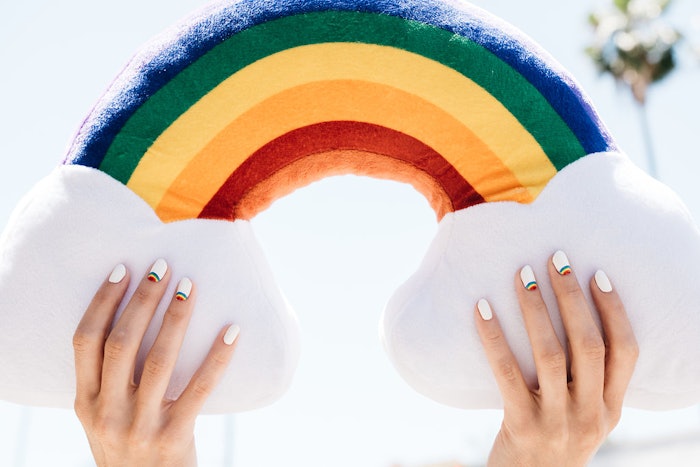
Rainbow Accent Nails
Express yourself or your support this June with a simply fabulous and understated Pride mani!

- To achieve the look, begin by shaping the nails into a softly rounded shape and completing cuticle care.
- Next, apply two even coats of white polish to the base of the nails, making sure to allow dry time in between each coat.
- Next take four rainbow polishes, beginning with red, on a thin brush. At the base of the nail bed, apply the red color in a thin softly curved shape from one edge of the nail to the other, making sure to fill in any gaps.
- Now that you have an outline, apply a thin line from edge to edge, layering your orange, green and blue color on top of each other.
- Once this is complete, as always, finish off with a top coat and cuticle oil for maximum shine!